LOGIQe - Creating a new scan session
Step 1 - Start a New Study on the GE LOGIQe ultrasound - Press the 'Patient' button

Step 2 - Search for Patient in Patient View list (last name, first name, etc)

Step 3 - Double click on Patient from list
Step 4 - Select 'New Exam' found at bottom

Step 5 - Select 'Exit' found at bottom left to begin storing images for this athlete

Step 6 - Verify Patient Name, ID and Image Settings

Step 7 - Use annotations to identify muscle to be scanned (not possible on all machines)
Step 8 - Using the proper scanning protocols, apply probe to muscle
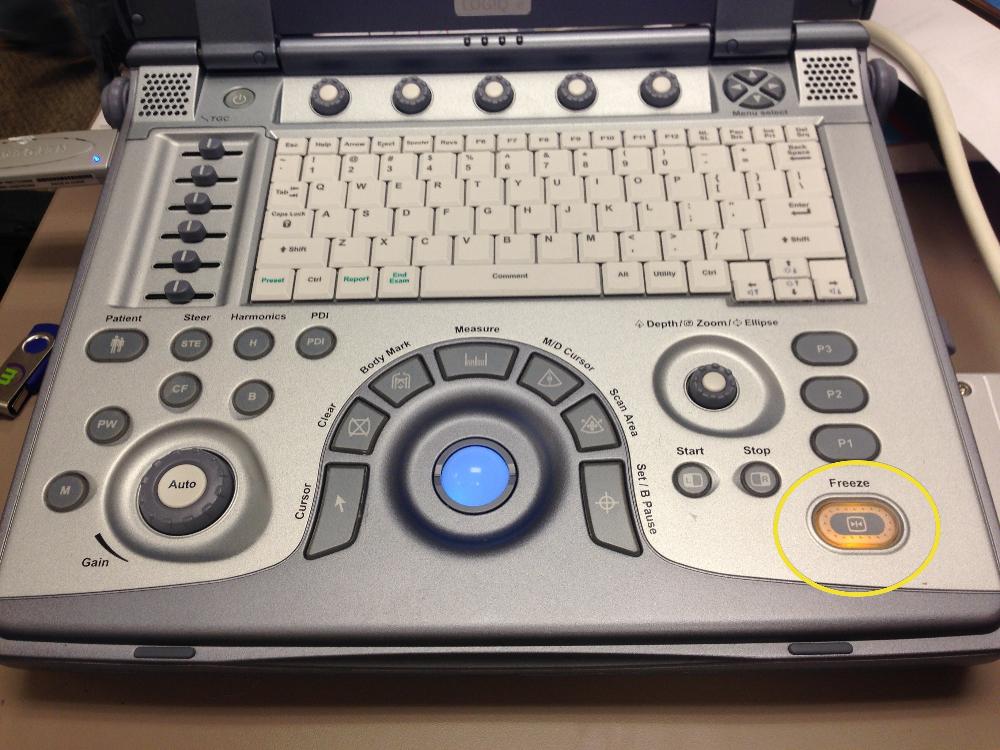
Step 9 - Freeze the image
Step 10 - Export image using the P2 button (some machines setup with P1 or P3 instead)

Step 11 - Unfreeze, and repeat (annotation, freeze, export) for each image
Step 12 - Navigate to app.musclesound.com in a web browser (Chrome)

Step 13 - Click Run Assessment at the top of the MuscleSound Application and follow steps accordingly

Step 14 - Identify session info (timing, notes), And Create Session
