Terason - Creating a new scan session
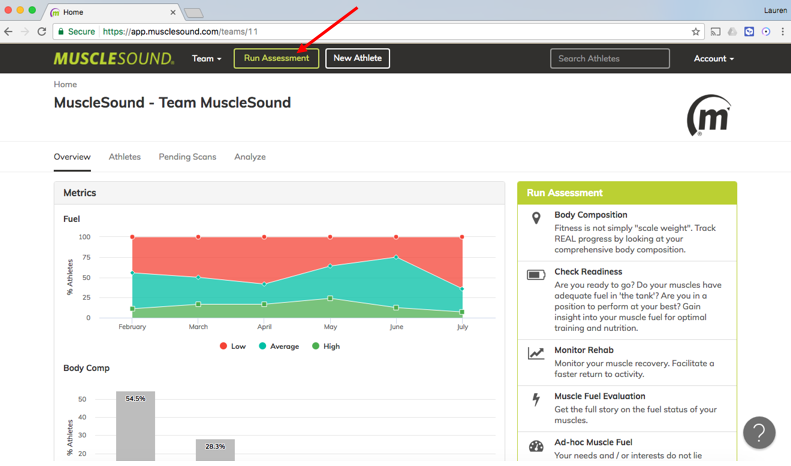
- Click the "Run Assessment" button on the athlete thumbnail on the Team page, the Home page, or on any Athlete page
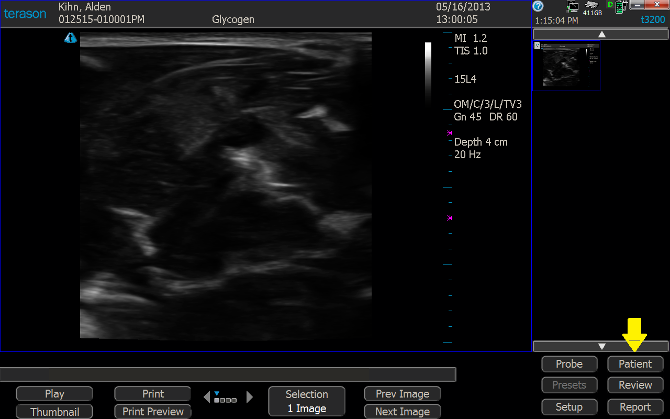
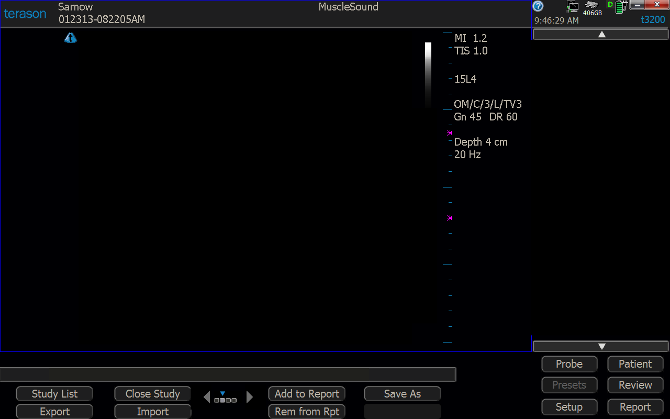
- Navigate to the Ultrasound Machine Terason Program Select 'Patient' from the ultrasound image screen
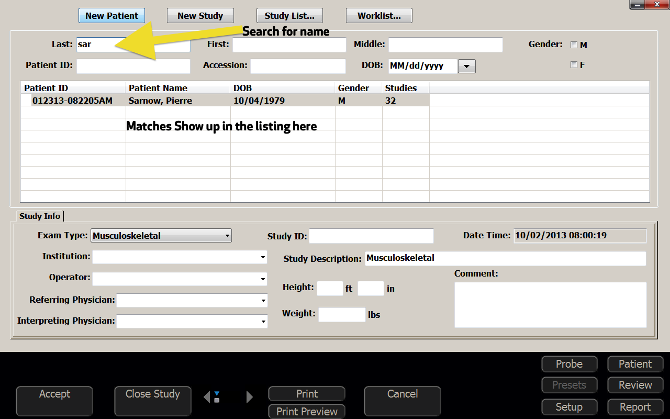
- Select 'New Patient' button found at the top left of the screen
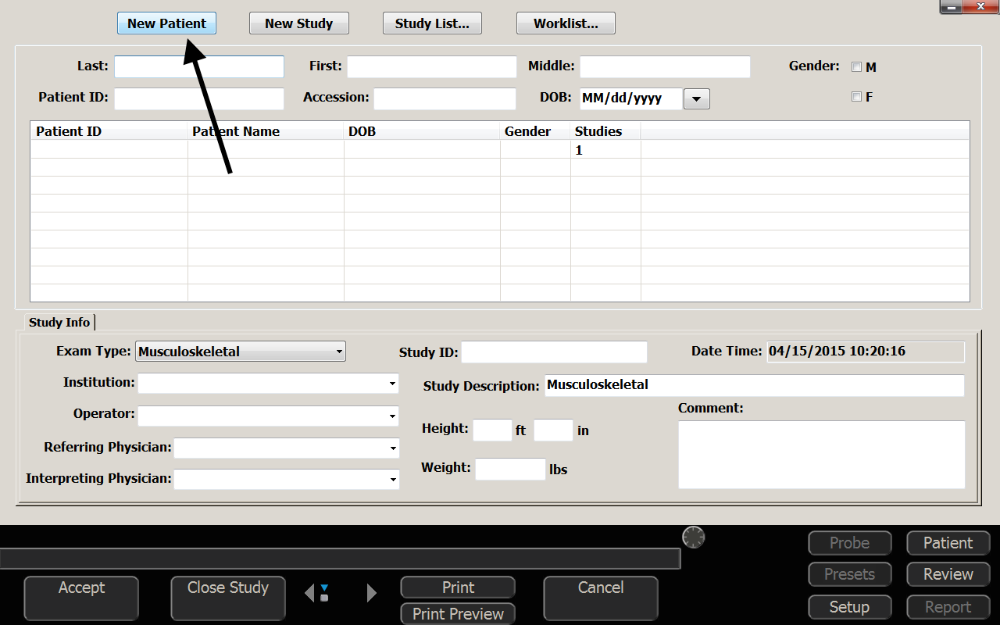
- Find Athlete by typing their Last or First name into the field, the matches will show up in listing
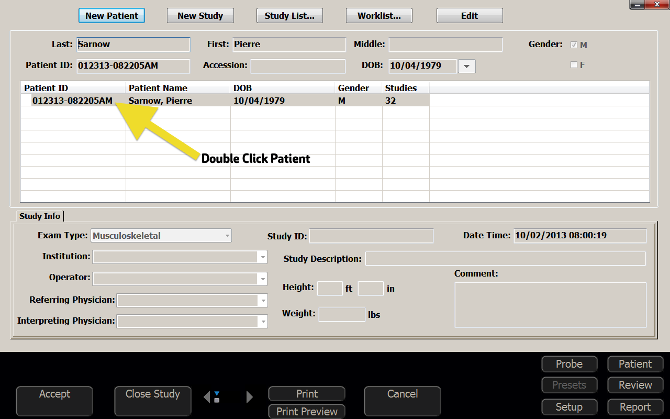
- Double-click on Athlete from listing
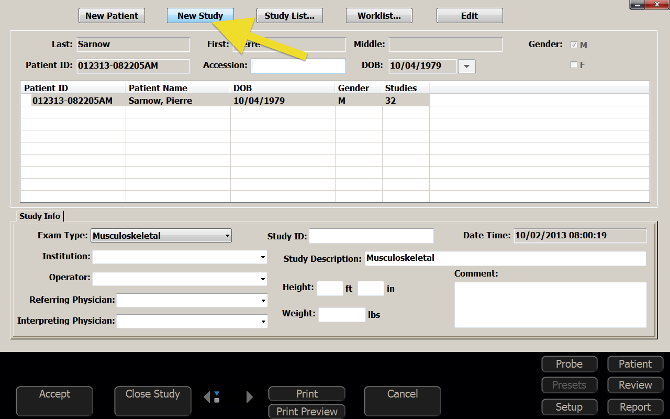
- Select 'New Study' Button at the top
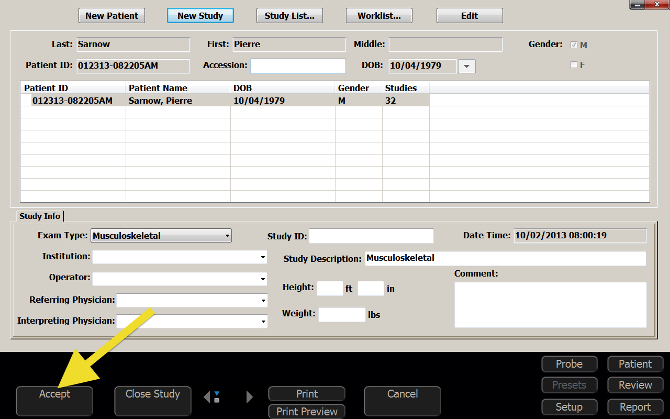
- Confirm new study by selecting 'Accept' at the bottom-left of the screen
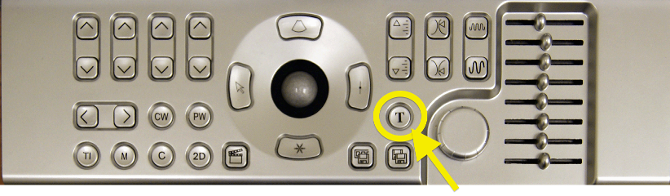
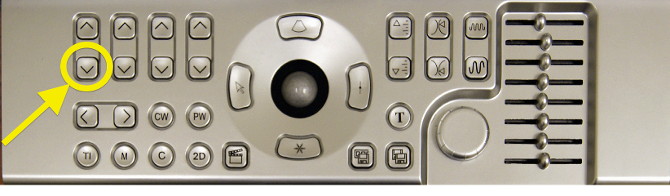
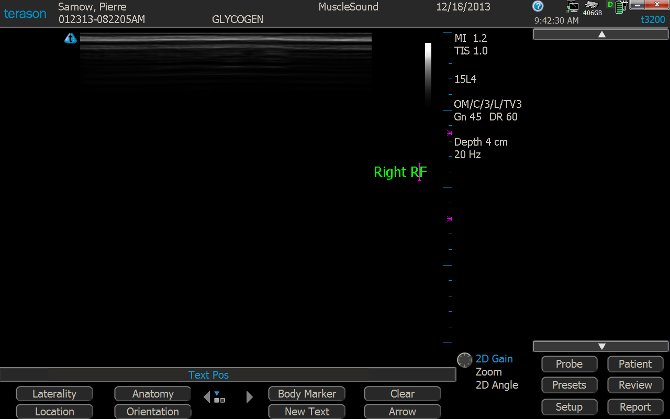
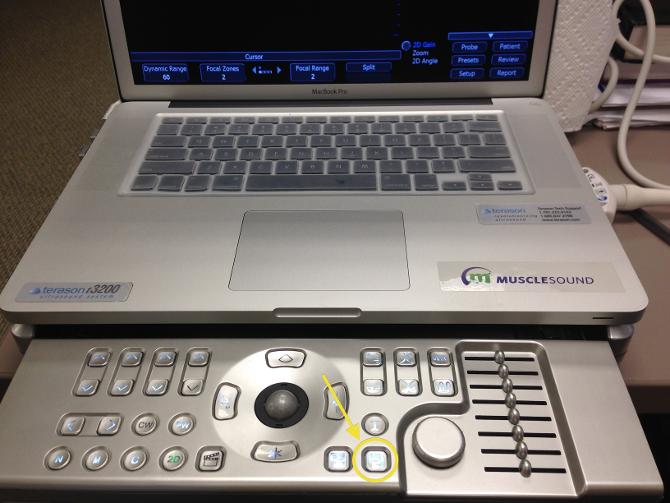
- Select 'T' button on extended keyboard to insert text annotation
- Toggle first ' ^ ' button on extended keyboard repeatedly to select side (Right or Left). *The ' v ' button toggles MUSCLE
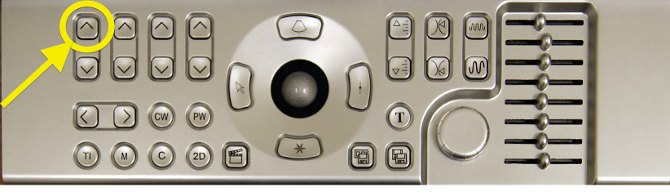

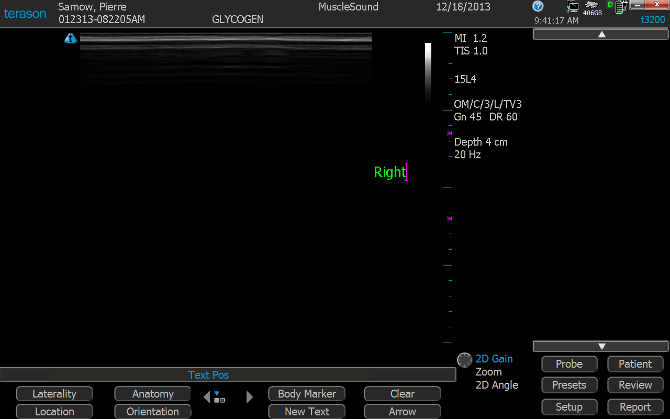
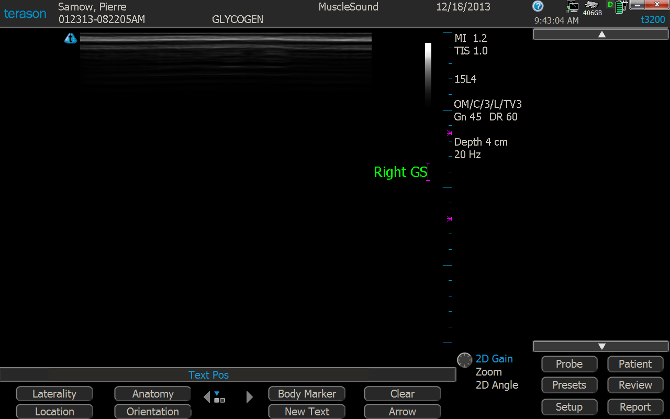
- Toggle first ' v ' button on extended keyboard repeatedly to select muscle (RF, GS, etc.). *The ' ^ ' button toggles SIDE
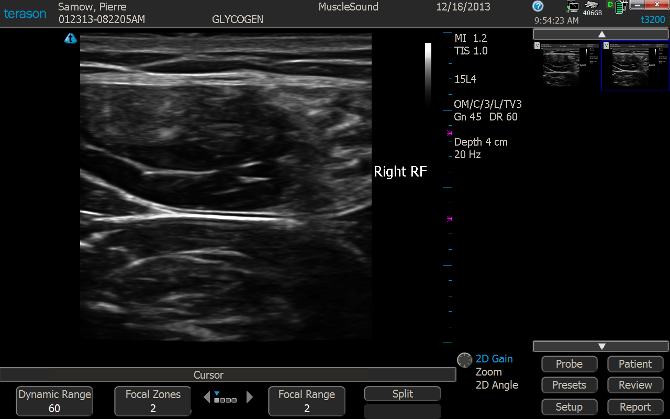
- For each additional image of same muscle, do not change annotation. Store images pressing the 'Save Image' button.
- For a new muscle, press the Text 'T' button and toggle to the appropriate Side and Muscle using the ' Λ ' and ' V ' buttons. Storing each image accordingly. The disk button on the extended keyboard will store each image
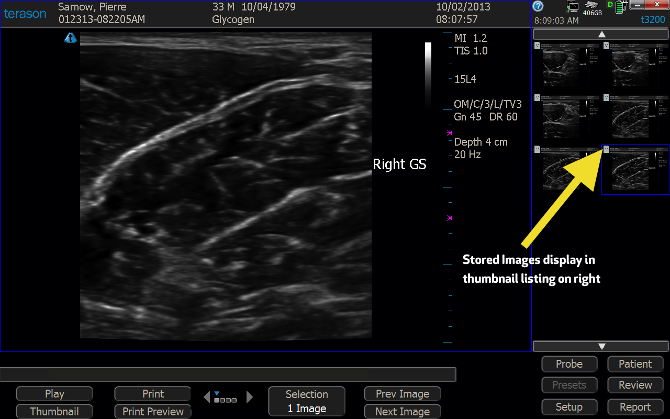
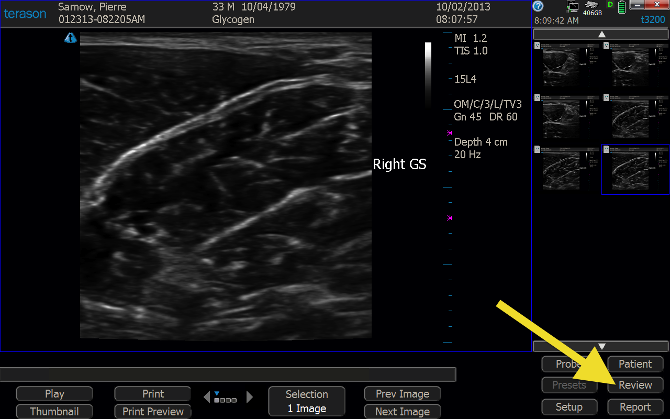
- After all images have been stored, Select 'Review' at the bottom right side of screen
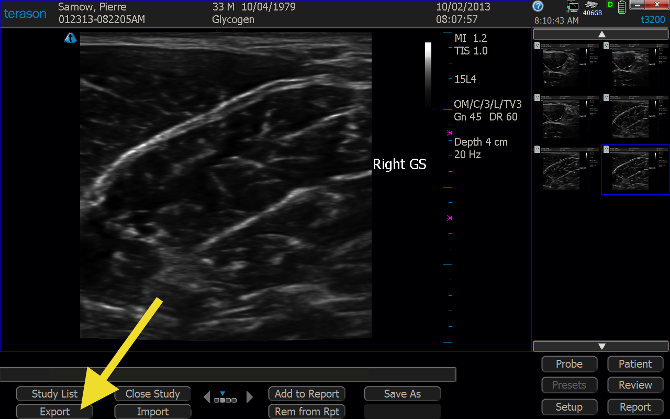
- Scroll with extended-keyboard arrows or scrolling arrows at bottom of screen to bring up "Export" button at bottom left
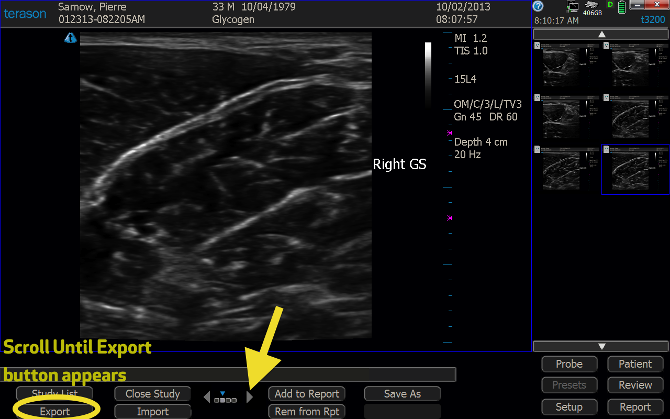
- Select "Export" at bottom left of screen
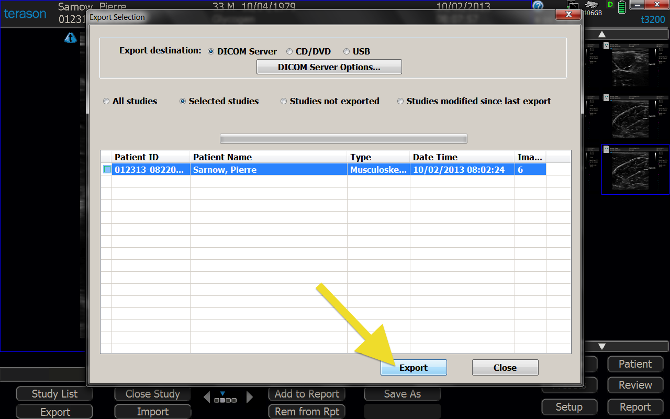
- Step 17 – Select "Export" at bottom of Export popup window
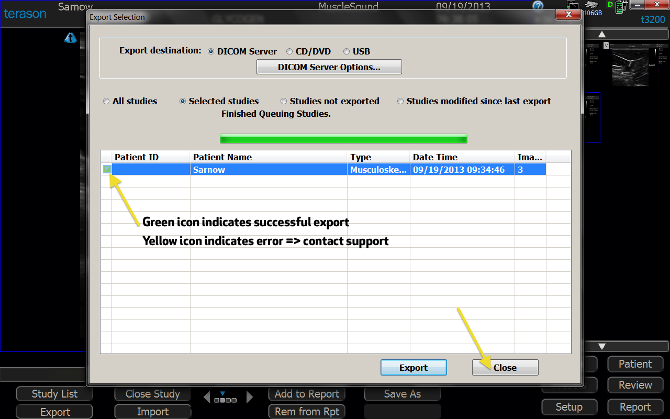
- Verify Export and Close popup window
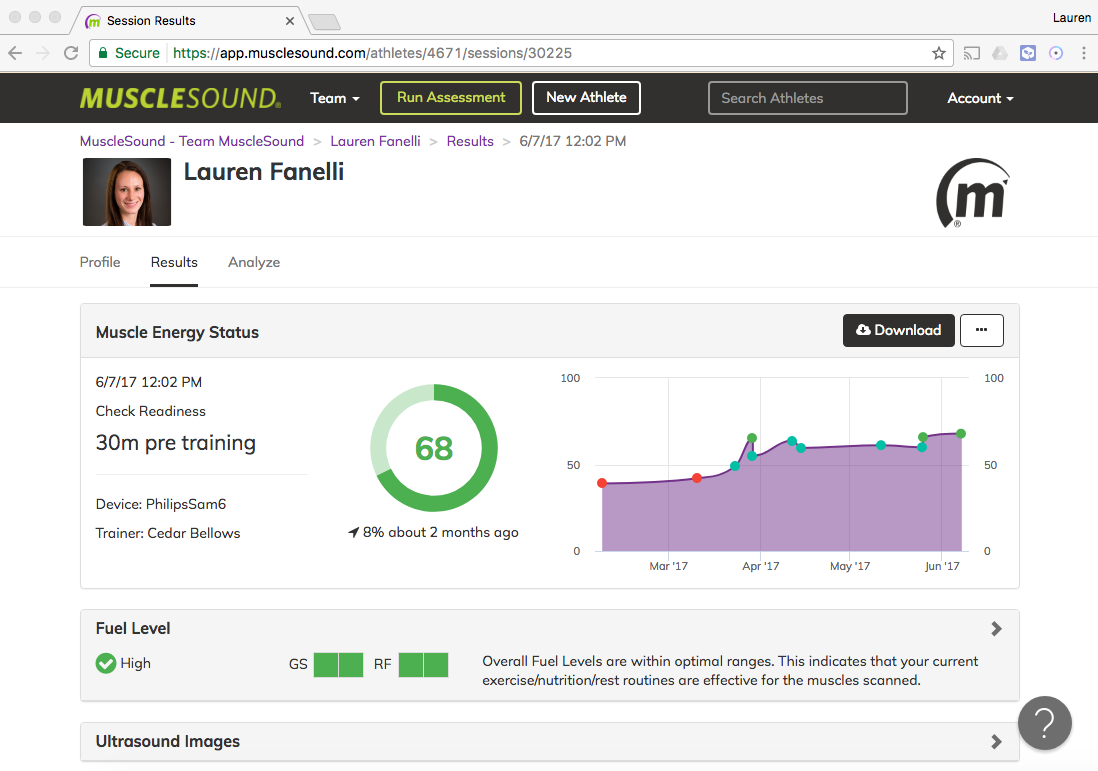
- Navigate back to the web browser and to the Run Assessment page on app.musclesound.com. Follow the steps outlined. Within a few seconds of exporting the images from the Ultrasound machine, they will show up under Step 4, Choose Study
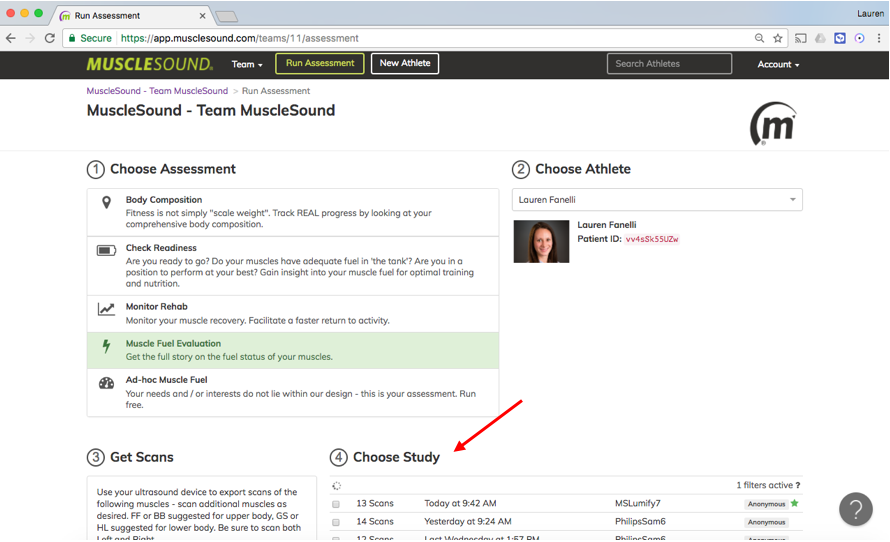
- Follow the remaining steps, select relevant timing and enter notes associated with session. Finally, press 'Complete Assessment'.
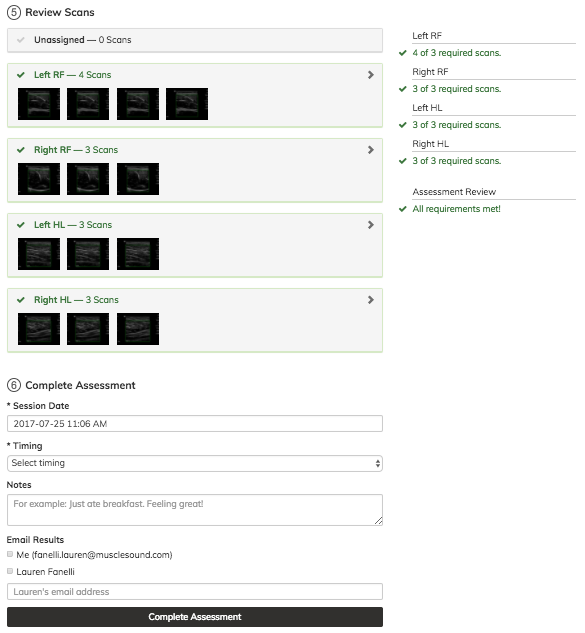
- Review the session results